Showing posts with label recipes. Show all posts

Tuesday, September 16, 2014

simplified chicken pot pie


 ^^ "Seriously guys, it's good stuff." ^^

 ^^ "Two thumbs up!" ^^

 ^^ "Chicken pot pie!!!" ^^

 ^^ "You guys have got to try my mom's chicken pot pie! It's delicious!!!!" ^^

 ^^ "...my belly is so full I can't sit up straight..." ^^

^^ "What do you mean there's something on my face, mom? I guess it's 
probably because I just devoured your delicious chicken pot pie." ^^
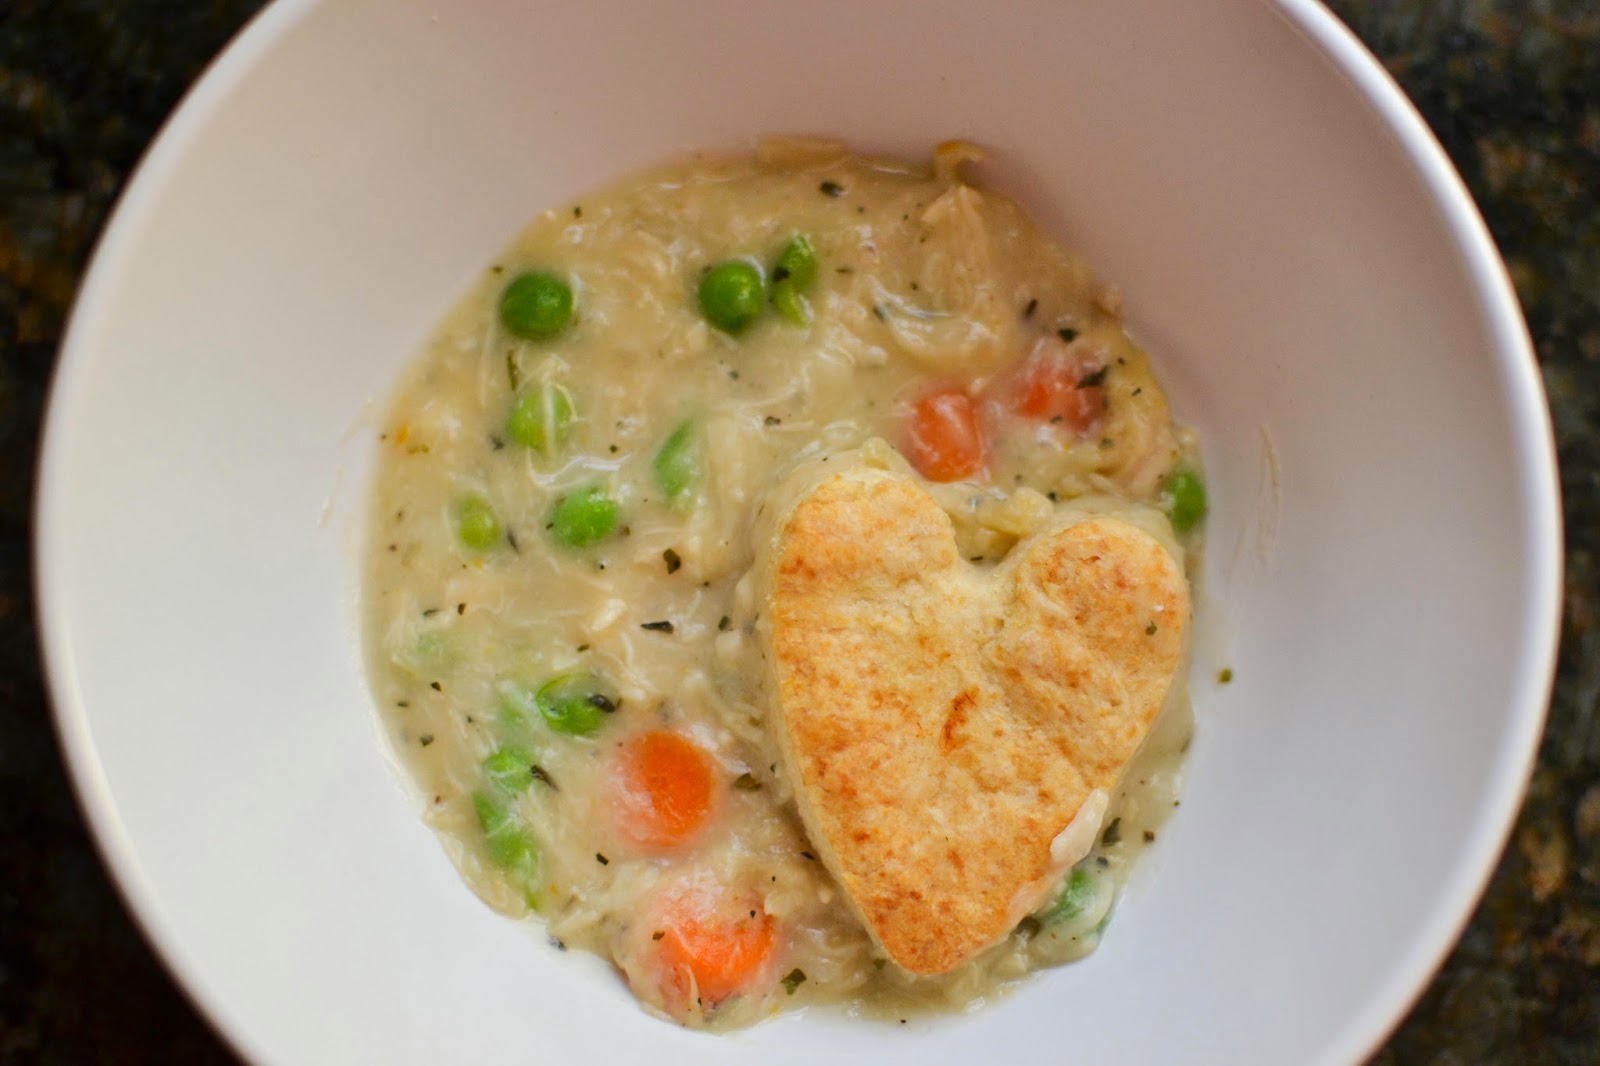
A couple of years ago I gave this recipe a shot. I'd never been much of a chicken pot pie fan, but this seemed different than the typical version so I tried it. I made several changes, mostly having to do with the chicken. I hate cooking meat, especially bone in meat, so a rotisserie chicken was not coming in my kitchen (I'm sure it tastes good, but that's more than I like to deal with (or pay for)).  We've tried boiled chicken and other things through the past year or so, but a can of already cooked chicken is just.too.easy. Of course if you like your meat a little more 'meaty' following the original recipe or whatever else seems tasty would be more than acceptable.  You could easily adjust the amount of carrots, chicken and peas you prefer as well. I could do with more vegetables and my husband sure wouldn't mind more chicken ;)

Chicken Pot Pie
Ingredients:
4 C water
2 T minced onion
2-3 t chicken bullion
2 bay leaves
1 1/2 C chopped carrots
12.5 ounce can of chicken breast
3 T butter or margarine
5 T flour
1/2 C milk
1 t dried basil
1 t salt
1/4 t pepper
1 1/2 C frozen peas

Directions:

  1. Bring water, minced onion, bay leaves and bullion to a boil. When bullion is dissolved, add carrots and cook until tender. Less than five minutes.
  2. While carrots are cooking, drain can of chicken and shred into small pieces. Set aside.
  3. When carrots are tender, strain two cups of broth and set aside. Strain carrots from remaining broth. Set carrots aside and discard broth or save for another use.
  4. Melt butter in sauce pan over medium heat until melted. Slowly add flour until mixed well. Slowly stir in two cups of broth previously set aside, along with milk. Stir constantly until smooth and slightly thickened. Add basil, salt and pepper.
  5. Stir in cooked carrots, chicken and frozen peas until well coated.
  6. Pour mixture into a greased 9x13 and set aside.
Biscuits:
1 1/2 C flour
2 t baking powder
2 t sugar
1/4 t salt
1/3 C shortening
1/2 C milk (probably less)
  1. Preheat oven to 400˚.
  2. In a medium mixing bowl combine flour, baking powder, sugar and salt. Cut in shortening until mixture is crumbly and combined. Slowly stir in milk just until moistened enough to hold together, up to 1/2 a cup.
  3. Turn onto a lightly floured surface and knead 8-10 times. Gently roll to about 1/2inch thick. Cut biscuits with a cup or cookie cutter and place on top of chicken mixture in 9x13. 
  4. Bake uncovered for 20-25 minutes or until biscuits are golden brown.
  5. Allow to sit 5-10 minutes before serving.

Enjoy!

Wednesday, May 14, 2014

the chocolate cake that changed my life (and my waist)

Since living here I've made our favorite chocolate for friends on a few different occasions and gotten fabulous feedback. Such good reviews, in fact, that one friend asked me to make a couple cakes for a party she was in charge of at work. Well those co-workers of hers thought the cake was pretty darn good, too, so I decided it was time to share the recipe.

This recipe was submitted to our family cookbook by my uncle Creed, and I'm not sure where he got it, but it has always been a favorite in our home growing up and in my own home now. It's moist and rich and delicious! And, importantly, easy :)

The Chocolate Cake That Changed My Life

2 C sugar
1 3/4 C flour
3/4 C cocoa
1 1/2 tsp baking powder
1 1/2 tsp baking soda
1 tsp salt
2 eggs
1 C milk
1/2 C vegetable oil
2 tsp vanilla
1 C boiling water

Preheat oven to 350 degrees fahrenheit. Grease and flour two nine inch round pans or one bundt pan. (I can't hear the word bundt without thinking of this clip from My Big Fat Greek Wedding. bahaha). Stir together sugar, flour, cocoa, baking powder, baking soda and salt. Add eggs, milk, oil and vanilla. Beat on medium speed for 2 minutes. Stir in boiling water (batter will be thin). Pour batter into prepared pans and bake for 30-40 minutes. Cool completely, then frost. 

And here's where the cake gets really easy... I frost it with chocolate fudge frosting from a can. No joke. That's the way I like it. It's not because I'm too lazy to make frosting, I just like the canned stuff best. My parents think I'm crazy, but there you go. 

If you do make a bundt, I recommend microwaving your frosting for a few seconds and drizzling the frosting on. Even easier. But a layer cake is always beautiful, too. We do that when I feel like doing more work :) 

Thursday, March 27, 2014

my perfect chocolate chip cookie

I was whipping up a batch of my fav-a-fav chocolate chip cookies this afternoon for a little get together tonight, when I realized.... I still haven't shared my recipe! I did want to say, first, that while this is my absolute favorite chocolate chip cookie, as close to perfection I will ever come in my baking career ;) everyone has their own opinions on what constitutes a great cookie and maybe this one isn't for you. Some people like their crackers cookies crunchy (you people are crazy...), others like warm cookie dough, and these are somewhere in the middle. They've got the slightest crunch but they're soft and just beyond gooey in the middle. They... sigh... I'm never going to do them justice, but I'll just say they never fail to make me say,"How are they so dang good!?" Seriously. Every. single. time.  So instead of you reading about them, you should go make some and then you'll see :)

Ingredients:
1/2 C shortening
1/4 C butter softened (you'll be glad if you use the real stuff!)
1 1/4 C brown sugar
2T milk
1T vanilla
1 large egg
2C + 2T flour
1t salt
3/4t baking soda
I've never measured how many chocolate chips I put in... probably about 3/4 of a 12oz bag?

Directions:Cream shortening and butter together in a stand mixer. Add brown sugar, milk and vanilla. Mix well scraping sides. Add egg and mix again. Scrape sides of bowl again. Gradually add half of the flour with the mixer going. Then add baking soda and salt, the mixer should still be going. Add the rest of the flour gradually. The dough should be slightly sticky and should feel almost fluffy. Scrape the sides and mix a little more. Add chocolate chips to your personal taste but make sure you stir in chocolate chips, as in by hand. You know, burn a few calories, you're going to eat a lot more in a couple minutes, that is if you haven't started sampling the dough ;)

Bake at 375 for 6-10 minutes. Usually we bake like six at a time just because we eat them all if they're all baked. While they are still very good with out being having the dough chilled first, they are better if you chill the dough for at least a couple hours. I pull them out of the oven when the peaks are just barely starting to brown a little. They'll cook a little more sitting on the pan.

It's not a terribly large batch, which is good for us because we eat a couple every night if the dough is just sitting in the fridge. But if you have a large family or crowd I'd go ahead and double it.  

Enjoy! 

(And if you gain five pounds this week, you know why)

Tuesday, June 5, 2012

"healthy" cookies: you're gonna want to pin this one!

so cookies can't actually be healthy and still be tasty enough to be called a cookie (or at last that's been my experience) but they can be low-fat cookies and that's better, right? ....right?  

Today I was craving cookies - oh boy was I craving cookies (In a non-pregnant way (don't worry babe, no #2 yet)).  But I kind of have this rule that a cookie isn't really a cookie with out chocolate.  Its just gotta have chocolate.  Here's the recipe for the cookies I chose to go with.  I'm so glad I did!  Hope you think they're as tasty as I found them.  Thanks Gina

P.S. I added a dash of cinnamon (we have a thing for each other cinnamon and I) and my dough turned out WAY thicker than hers.... unrelated to the cinnamon affair, but the cookies were still excellent.  hip hip hooray!

P.P.S.  It's tempting to eat lots because they are "healthy" but I realized after the fact that they aren't actually that healthy if you eat 5,923,097,439,208 lots of them... just a thought....

Saturday, January 28, 2012

a twist on pizza

Almost every Saturday is pizza night around this family's place.
we.love.pizza.
Last week I decided I needed a change from our usual pizza.
So I decided to try a little twist - or shall I say 'fold'.

We have a dough we always use that I got from my sister-in-law.
Its so good, and most importantly super easy!

1. Put 7/8 C very warm (but not too hot) water in a bowl
Sprinkle 1 T yeast and 1 t sugar over the water and wait for it to bloom
(approximately 5 minutes)

2. While that's blooming, 
 Mix 2 and 1/4 C Flour and 1 t of salt
I like to add some added spices too.  
Like oregano, italian seasoning, basil, garlic salt/powder.

3. Pour your yeast mixture into the dry ingredients
and mix well (I usually start with a spoon and end up with my hands)

4. Add 2 t of oil and mix til a nice 'normal' dough

Letting it rise isn't necessary, but we like to let ours rise a little.
Just for a little added fluff-ness. If you do let it rise, make sure you cover it.

Normally after letting it rise for a little bit I usually roll it out
on a lightly floured counter top.  Then I put cheese about an inch 
from the edge of the pizza. I fold it over and press it down to 
keep it from opening in the oven.  (Basically you just made a cheesy crust). 
Assemble the rest of your pizza like you normally would, 
only I brush a beaten egg on the cheesy crust and sprinkle garlic powder on
 my half and garlic salt on Jeremy's half.

Bake at 425 for 11 minutes and you have yourself a DELICIOUS pizza!

But, like I said, this time I put a little twist on it.

Make the same crust and roll it out. 
Next cut into 8 triangles and arrange like so.

Spread your sauce around.

Add your desired toppings
{I used mozzarella cheese, chopped pepperoni,
italian sausage, and diced bell peppers}

Next tuck the tips of your triangles under and around your toppings.

Right out of the oven! mmm.... smells so good!
We have a pizza stone that we LOVE! 
{Thank you wedding gift cards}
To keep it from sticking to the stone
and with out the mess of corn meal, 
I cook it on a piece of parchment paper.
But put your dough on the paper before assembling your pizza!

TA- DA! Wouldn't this be a great dish to display at a dinner party
or as an appetizer?  You could put almost anything in in it. 
Like ham and cheese... and... well I'll let you get creative!

I'd love to hear if you come up with anything
 to take this recipe to yet another level!

Friday, January 13, 2012

one of those days

I know what you're thinking...
This is going to be one of Sarah's rambling 
''I've had a horrible day'' posts.
Well YOU WERE WRONG!
Today was a great day. It was one of those days 
when I had a moment that made me realize, 
"Yes. This is what happiness feels like."
This moment happened while I was fixing dinner.
I finally felt like the homemaker I've been wanting to be.
My favorite playlist was serenading me with the very best tunes.
Madeline was sleeping peacefully in her swing.
And I could hear Jeremy's voice in the other room as he talked to his dad.
{He got home today so naturally I was glad to be able to hear him}
It might sound silly to some, but I kind of felt like supermom. 
Like I was in my element for one of the first times.
Doing the dishes didn't feel like a chore, 
I was just happy to be doing my part for our family.
I love that I was cheerfully putting together a healthy meal
that I knew my husband would enjoy. 
Money might be tight, and I don't have the 
most beautiful kitchen, or house for that matter.  
Life still has many mysteries for us to unfold.
But in that moment you couldn't keep a smile off my face it you tried. 
Because I love being a a homemaker.
I love being a mom.  I love being a wife.
And most of all I love being a daughter of God. 
During the past few days I've been reminded of how
 aware Heavenly Father really is of me and my family.
This is where I'm supposed to be and this
 is what I'm supposed to be doing.
And I couldn't be HAPPIER.
___________________________________

And to finish off my awesome day I single-handedly
{Literally single-handedly because I had a baby in one arm}
made some delicious cookies!
How did I manage to do that you ask?
It was really easy, because it's a super easy recipe!
They are Chocolate Fudge Cookies found here
You just take a chocolate cake mix, mix it with 2 eggs
 and a 1/2 cup of vegetable oil, fold in 1 cup of chocolate chips 
and voila - you're done!  Put 'em on the pan like 
you would any other cookie and bake at 350 for 8 mins!
How easy is that!?
Seriously, if I ever forget that I'm supposed to make a desert 
sometime for something that is my new go-to recipe.
Hope you have a great LONG weekend!
I plan on spending mine enjoying having the hubby back :)


Monday, September 19, 2011

Bran Muffins that'll make your life easier

Let's be real, sometimes its hard to get a good breakfast every morning when you're running out the door.
Its hard to make yourself something good that's not just cold cereal, you know? 
Well I have a solution for you!

Introducing 6 Week Bran Muffins
I came across a recipe that makes a lot of muffins and that you can keep in your fridge for up to 6 weeks!
That way you can just cook them while your in the shower, or you can microwave cook them - still working out the kinks on the last one, but so far so good not too bad. 

Okay here's what you'll need:
2 C boiling water
4 C Kellogg's All-Bran Cereal
1 C plus 2 Tbsp. shortening
2 C sugar
5 C Flour
2 C 100% Bran Flakes Cereal
1 tsp salt
5 tsp baking soda
1 qt. buttermilk (substitute: add 1 T vinegar to each C whole milk; let sit 5 mins)
4 eggs

Instructions:
Pour boiling water over All-Bran. Cover and let stand. In a separate bowl, cream shortening and sugar; add eggs and buttermilk.  Add Bran Flakes and moistened All-Bran and let stand while you sift flour, salt, and soda. Blend dry ingredients into wet. Fold in raisins if desired. Fill muffin cups 2/3 full and bake at 375* for 15-20 minutes.

-- Recipe compliments of my Aunt Alice Marie. {She's pretty much the bomb.com nbd...}

Microwave instructions: Spray a minimal amount of pam into the bottom of a glass mug. Fill mug with 1/3-1/2 cup batter. Microwave on high for a minute and a half. Pour muffin out onto plate. Enjoy your hot muffin! When we did this the muffin was really fluffy - but Jeremy said it wasn't bad. We'll keep messing around with it and let you know if we come up with something better. 

So there you have it folks! An easy breakfast that you can just grab out of the fridge and cook each morning! I'm thinking I might load up a little muffin tin and let them cook while I'm in the shower. 
OH I also cooked mine with a little brown sugar on top -hehe. I like a little sweet with my healthy, you know? And I love my bran muffins with raspberry jam! It's so good!
{sorry... I always forget to take pictures... so you'll just have to try them out yourself to see!}

BON APPETITE!